Project Management
Waterfall Project Management Methodology Explained

We’re going to take you back to the 19th century during Henry Ford’s reign. Ford noticed the inefficiencies and excessive time the automobile production process took, and knew things had to change. That’s when he adopted the assembly line.
Ford assigned each member of his team to build a very specific part of the automobile. Once that team member completed their task, it would move down the line to the next person, and then so on and so forth.
This is an early large-scale example of the waterfall project management methodology in practice. Over the years, the waterfall method has evolved and been implemented in many different types of projects from managing supply chains to software development.
In this article, we will take a deeper dive into what the waterfall method is all about.
What is the Waterfall Project Management Method?

To be more specific, the Waterfall method incorporates very distinct stages of a project that need to be 100% complete before moving forward to the next task or phase. Future stages or steps cannot begin until the tasks and phases before they are complete.
The Waterfall method puts a huge emphasis on the initiation and planning phases of the project. Since the planning portion is so crucial, this reduces the risk of hiccups or challenges that could potentially arise down the road. Without thoroughly collecting requirements, planning, or thinking through a project and its core milestones, teams will find following the Waterfall method inefficient or difficult to execute.
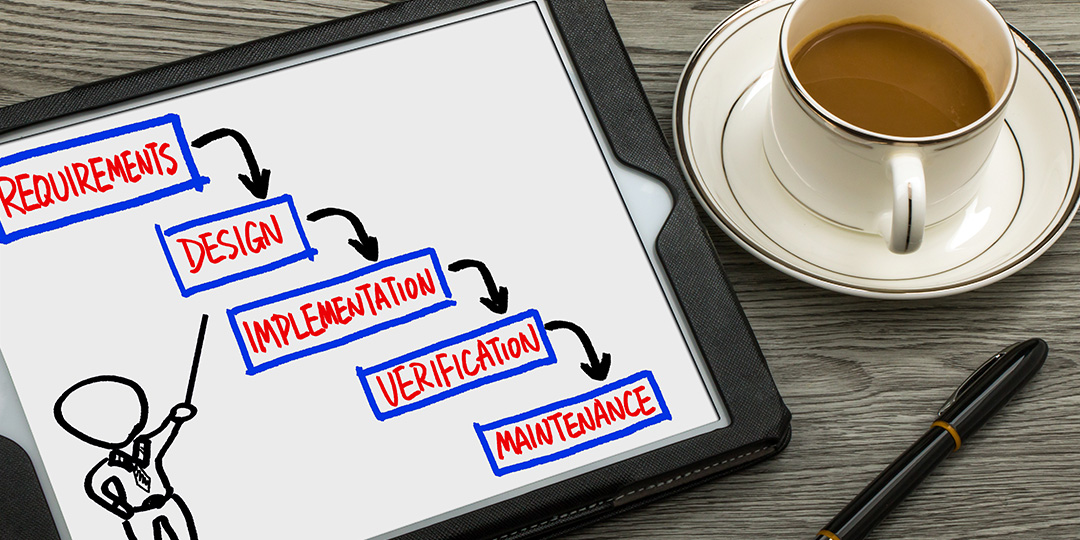
The 5 Stages of Waterfall Project Management
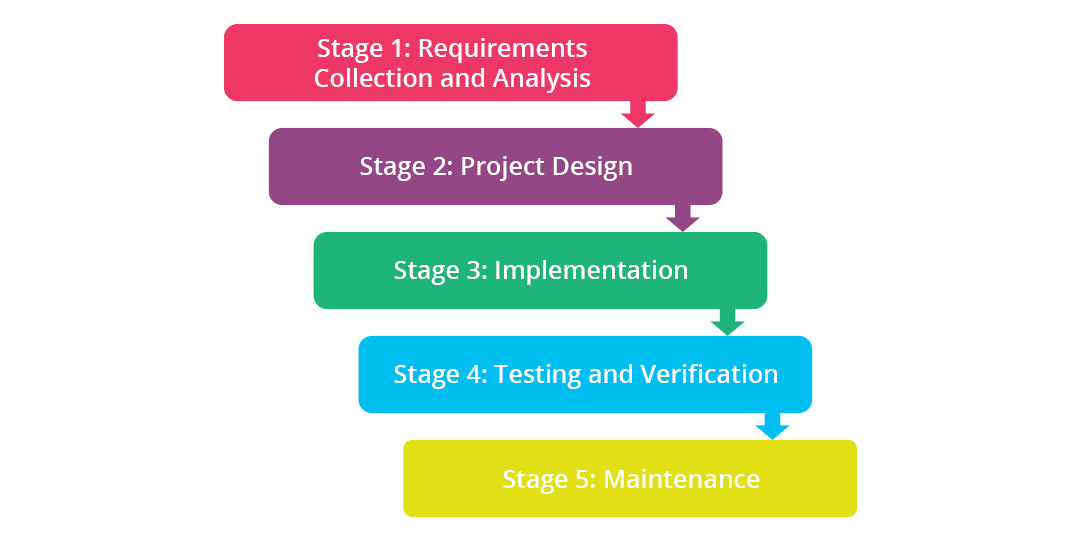
There are five core phases of the Waterfall methodology. Below are the stages and how they will be incorporated into a hypothetical project.
Project Synopsis: A retail client requests for the team to build a software platform to regulate the client’s incoming orders.
Stage 1: Requirements Collection and Analysis
This phase involves outlining the core requirements of the project, the challenges, what is needed to accomplish the specific tasks, the appropriate functions that need to be executed, and who will be responsible for them. The more detailed this phase is, the better the end result.
To implement this plan into the project mentioned above, here is what stage involves:
- Identify Project Scope: Team leaders discuss the project goals and details (budget, deadlines, deliverables, objectives, and so on). This is crucial because it sets the tone for the entire project and ensures everyone is on the same page.
- Stakeholder Expectations: Once your team is on board, you can bring your project scope back to the main stakeholders to ensure you’re meeting their expectations.
- Research: Though you may have built similar apps or platforms for other clients, it’s important to take the time to understand what the client is looking for in their software, and how it solves their challenges, pain points, and helps them reach their business goals.
- Assemble Team: Once the scope is approved, you can assemble your team and decide who does what and by when. If there is a shortage of resources or a talent gap, then this phase should include recruiting and onboarding additional resources.
- Kick Off: This step transitions the project from requirements gathering to execution. The purpose of this meeting is to serve as a “jumping off” point where all project team members know what they need to do and by when to do it.
Stage 2: Project Design
This stage puts the outputs and exit criteria from the first stage into an actionable project plan, such as procedures, tools and techniques, deadlines, and end goals for each stage.
When it comes to our retail project, below is how this stage unfolds.
- Itemize Tasks: Create a work breakdown structure (WBS), which is essentially a list of everything that needs to be produced and delivered, according to the master timeline.
- Create Schedule: Assigning deadlines will make tasks actionable to project team members and also help the project manager understand how long specific tasks will take, when the next phase can begin, and how everything rolls up to the master timeline.
Stage 3: Implementation
This stage is the execution stage and where the work happens and when core development milestones are met. This phase might also include internal and external stakeholder review sessions to ensure the product or project is meeting requirements and quality parameters.
Here is where the team begins building the actual platform for the client.
- Assign Team Tasks: This step involves assigning tasks to team members.
- Monitor & Track: Depending on what part of the platform is being worked on, the team leader or project manager should be overseeing the work to ensure it is meeting requirements, adhering to quality standards, and will be completed on time.
- Report to Stakeholders: It’s important to keep stakeholders updated on project progress along the way. This can be done via weekly status reports, meetings and phone calls, or a timeline or dashboard.
Stage 4: Testing and Verification
With a bunch of moving components throughout the project lifecycle, this testing and verification stage verifies that the product, feature, or project meets requirements, quality objectives, and customer or stakeholder expectations.
To help QA personnel with this stage, it’s important to create a test plan, identify acceptance (or pass/fail) criteria, or even a QA checklist for engineers to follow. Several rounds of testing might be required to ensure a project is ready for release or delivery.
We’ve gone through and fixed the bugs and presented them to the client, but haven’t gone live. Why’s that? We have one last stage. Testing/Verification.
- Test: Before going live, the team tests to ensure that the platform and features are not only working as they should but that they are also meeting requirements.
- Deliver App: Finally, the team presents the new platform to stakeholders and walks them through the different features. Once the final deliverable is signed off, the team can push it live.
Stage 5: Maintenance
The “Maintenance Mode” phase is an iterative phase that involves putting the project or initiative into practice, observing and recording experiences and outcomes (noting successes and failures), implementing changes and monitoring those changes, and optimizing.
Many project teams also use a Continuous Improvement (CI) plan to ensure they are iterating and optimizing regularly.
We’ve gone live with our platform and it has exceeded our client’s expectations. Since we’ve built it, we can stay involved to make sure the client knows how to work the features and can also report back to us with any questions, concerns, or modifications.
Advantages of the Waterfall Method
Like any project management methodology or framework, there are pros and cons to each one. Here are some of the advantages of the Waterfall methodology:
- Fairly straightforward to follow
- Has a clear structure with defined steps
- Best for internal teams
- Puts large emphasis on clearly defining requirements and quality
Disadvantages of the Waterfall Method
- Difficult to backtrack or make changes
- Doesn’t typically involve clients or end users until release or delivery
- Testing and QA is delayed until after development or production work rather than during iterative cycles
When Should You Use the Waterfall Method?
As mentioned above, the Waterfall method is ideal when the requirements and end goal are crystal clear, there is little uncertainty or risk of change, and the project is relatively short.
The Waterfall methodology is best suited for the following types of projects:
- Software development
- eCommerce supply chains
- Manufacturing projects and operations
- Flight controls
How Rindle Can Help Implement Waterfall Project Management
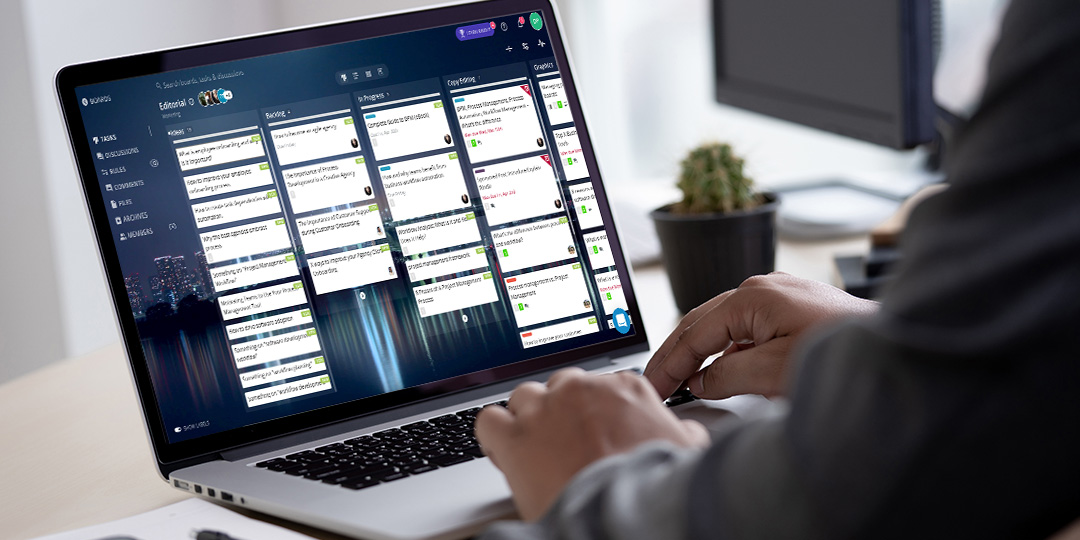
Rindle is a tried and true platform designed to help project owners, project managers, and businesses organize and manage their projects, regardless of framework or methodology. If you follow the Waterfall methodology, then you can use Rindle to build a complete WBS and timeline to monitor and track progress within each project phase, manage resources and workload, and even pull reports.
With its no-code interface, Rindle is easy to build and implement the best project management methodology for your team.