
We’ve now covered the core building blocks that will help you build the blueprints for your team or organization’s workflow and overall structure:
-
Workflows
- State Machine Workflows
- Sequential Workflows
- Rules-Driven Workflows
- Projects
- Personal Tasks, Task Lists & Repositories
- Hub & Spoke Model for Workflows & Projects
I’m sure your head has been spinning with ideas on how you can apply these structures to your workflow. Now it’s time to write it down and document your blueprint. Your blueprint will look different depending on whether you are doing this for a single team, multiple teams, or an entire organization. Your organization type and your unique workflow attributes will also be key factors in how your blueprint is ultimately structured. I’m going to layout some example blueprints to not only give you a visual of what a blueprint might look like, but also to give you a starting point for your own. Let’s get started!
Creative Agency (entire company)
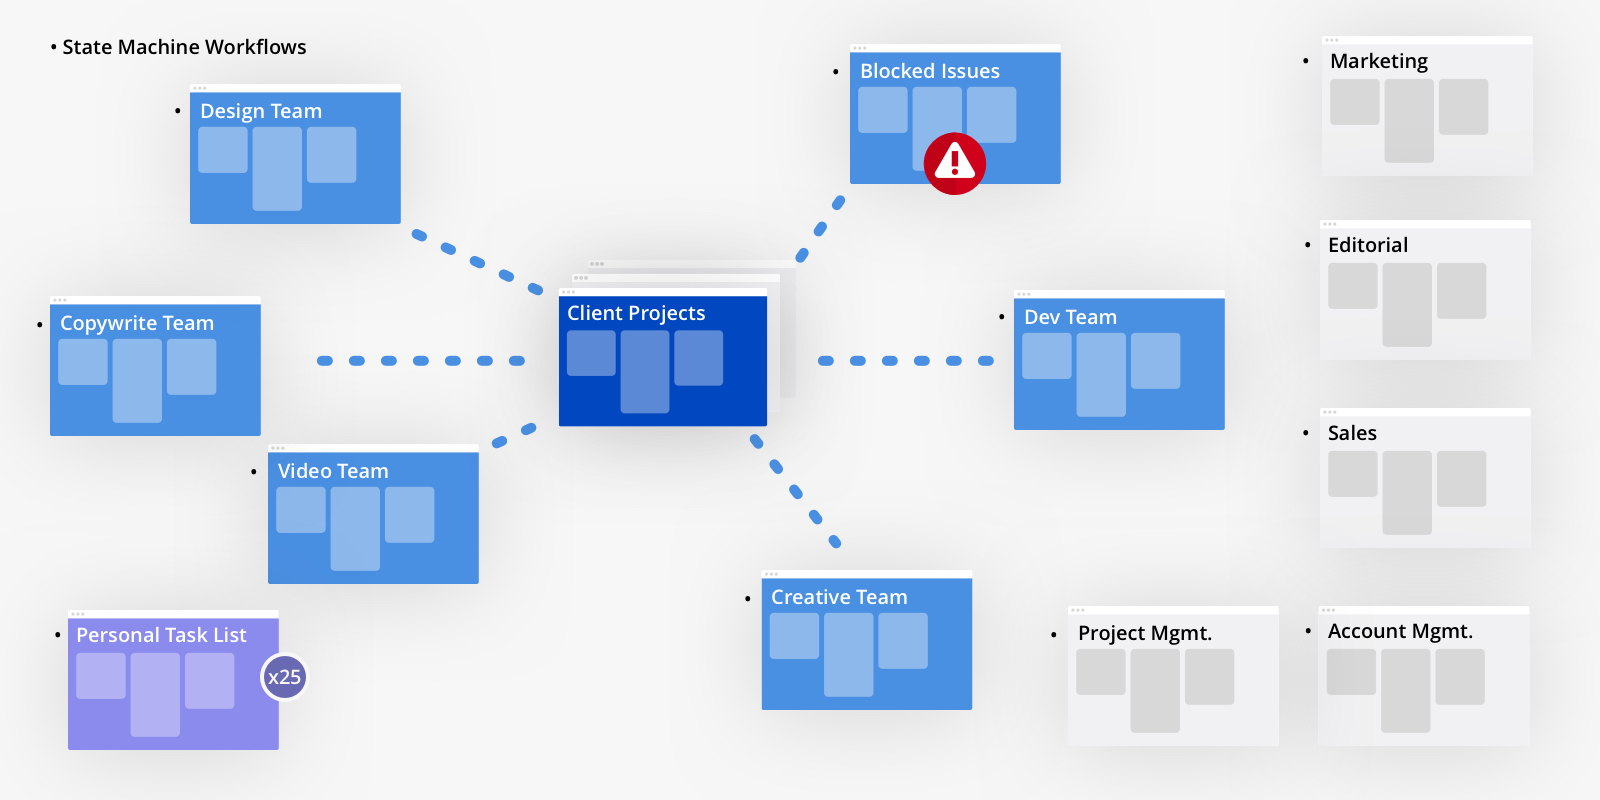
A creative agency typically has a project-driven workflow. This is true for most client services organizations. As they close new business with clients, new projects are created and work is delegated to various departments and team members.
Since projects are the hub for all collaboration, task management, and project tracking, the Hub & Spoke Model applies perfectly. While the projects act as the hub, the various teams and departments tasked with doing the work act as the spokes. As you can see in the blueprint above, the Hub & Spoke Model visually represents a wheel.
In addition to the teams and departments, I’ve also included two additional boards for blocked issues and creative approvals. These boards will provide a central place for management and key personnel to organize and process blocked issues that may need to be escalated and creative projects in need of approvals.
To round off the company-wide workflow blueprint, I included a Personal Task Lists board for each employee (25 in total).
In the bottom left corner of each box I’ve labeled the type of workflow that will be used:
- State Machine Workflow = SMW
- Sequential Workflow = SW
- Rule-Driven Workflow = RDW
For boards that house checklists and task lists, you can use:
- List-Based = LIST
If you’re not sure yet, just use a question mark (?) as a placeholder.
In addition to the main project workflow, I created a stand-alone board for other departments in the company so each team/department has a place to receive internal/external requests and manage department specific tasks and assignments.
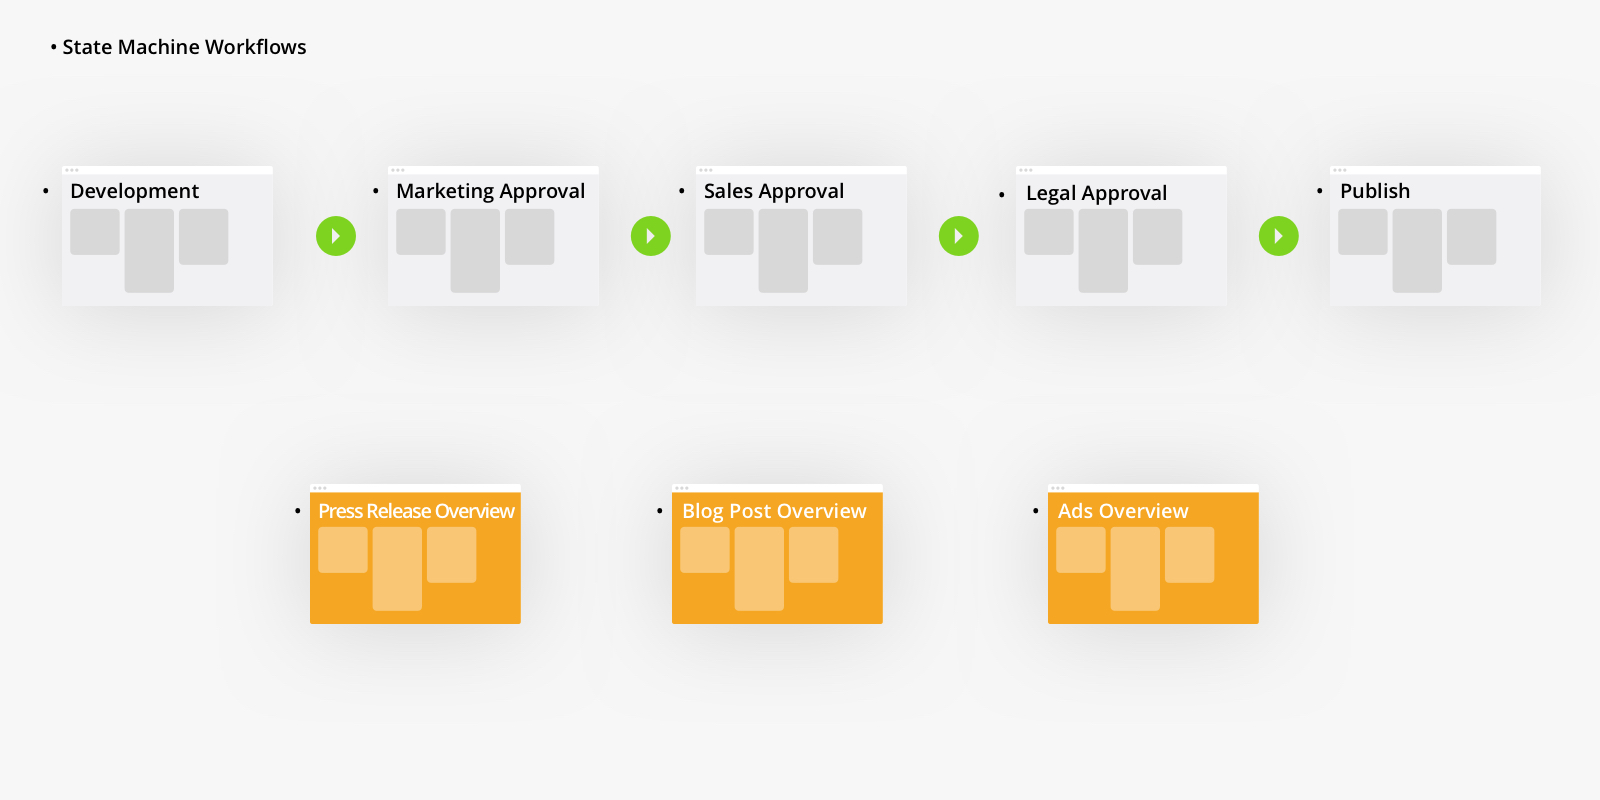
Marketing teams can output many different types of content and documents for various reasons. This content can include images, blog posts, press releases, ads, and more. Typically, this content needs to be reviewed and approved by different people and/or teams and departments. For example, after a project is developed, it will need to be approved by Marketing, approved by Sales, and finally, approved by Legal.
This type of workflow is sequential. It moves forward, in order, step by step. If this workflow consisted of a single document type, like press releases, a sequential workflow on a single board would be sufficient. However, this particular workflow pertains to many different content types from the entire marketing department running through it, so a multi-board sequential workflow is a better fit.
As you can see in the workflow blueprint, the content will flow in a linear fashion across more than one board.
One downside to a multi-board workflow is that it’s not easy to see a high-level view of all the work that’s currently in the workflow. All of the work is sitting at different steps, for different periods of time. To solve this, I used Mirrors to create stand-alone overview boards for each type of project. This allows a single, filterable view of all tasks from all the steps in the workflow to be seen in a single board.
It’s important to note it is perfectly fine to have a state-machine workflow exist within individual boards of your multi-board sequential workflow. The tasks will flow between boards in a sequential manner, but within each board they can move forward and backward in a state-machine workflow.
Apparel Production Company
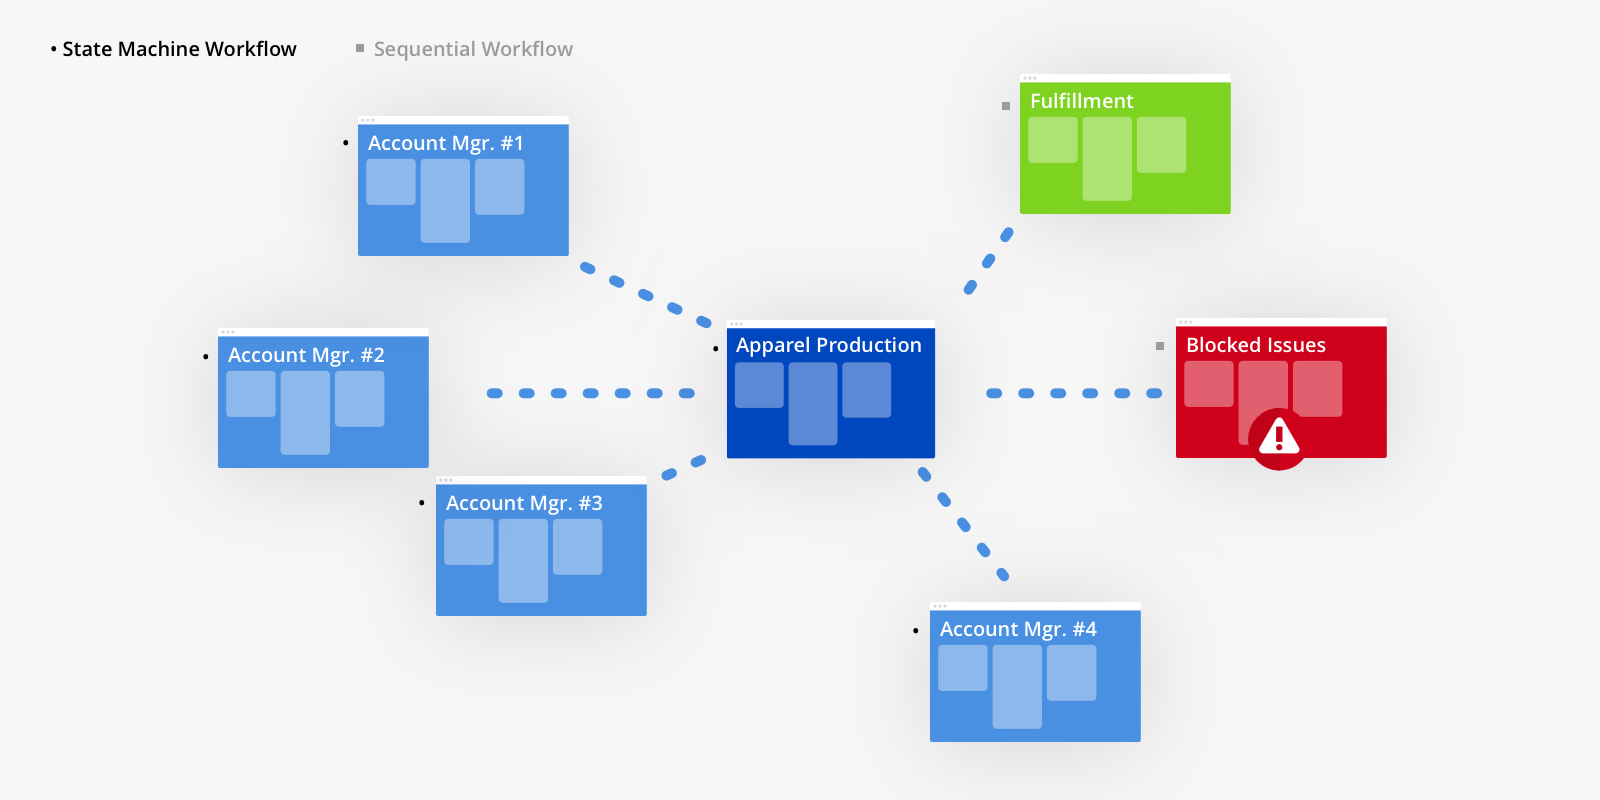
In this example, we’ll take a look at an apparel production company, specifically on the print and fulfillment side of the business. This company makes apparel, working with vendors to custom print solutions for their customers. For some orders, they store and fulfill e-commerce orders on their customer’s behalf.
A number of account managers need to see and manage orders individually as they move through production and fulfillment. Identifying the print production process as the central focus, a Hub & Spoke Model makes the most sense to use here. While the print production process acts as the hub, the account managers and the fulfillment process act as the spokes.
One might assume that fulfillment comes after the print process. A unique aspect of this example is that the fulfillment process actually runs concurrently with the print production process. The fulfillment team needs to be aware that the print order is in process and headed their way. If they were notified after the entire print production process was finished, they would fall behind and lose time.
This is why Hub & Spoke is a better solution than a multi-board sequential workflow. If the order is flagged as a “fulfillment” order, it will remain in the print production workflow but also enter into the fulfillment workflow at the same time.
In addition to the account managers and fulfillment boards, I’ve included an additional board for escalated blocked issues. This board houses all blocked issues across all print production and fulfillment process, providing a central place for management and key personnel to manage them.
Keep this Workflow Blueprint handy, as you’ll be continuously adding more information to it. Once it’s complete, you’ll use it as a guide to set-up your workflow in Rindle.
Make Your Own Workflow Blueprint
Ok, it’s time for you to take pen to paper. (Or maybe pencil to paper.) You can use a good old-fashioned sketch pad, a whiteboard, flow-chart software, or your favorite graphics tool like Sketch. If you need to, use the examples provided above to get started.
Don’t worry about the inside of the boards yet; we’ll get to that part. We’re just blueprinting the high-level workflow at this point.
If you use a manual method, be sure to capture whatever you create by taking a picture of it, just in case. I have accidentally erased quite a few papers and whiteboards in my lifetime. It’s the worst feeling!
Before Rindle, our team felt disconnected and disorganized. From our very first project on Rindle we noticed we spent less time managing software and more time getting work done.